Countess Echo fights Dengaroo
Continuing on with this series on how to fly Echo, I want to focus on a simple first engagement with a list that counters Echo. To make it simple, I removed asteroids, and had the enemy's ship move last. For this post, I am going to focus on Dengaroo as he engages the castle. This match up is very hard to win against, but I wanted to show my thought process on taking a calculated risk to try and push the match in my favor. I have beaten Dengaroo a few times with it, but the possibility of him one shotting Echo is always there.
Rules for fighting Dengar:
- Generally, don't attack Dengar if he has arc on you
- Split up Echo and Ryad so that he cannot have arc on both in the same turn
- Take an Evade whenever possible (Dengar has Zuckass, but not 4-Lom
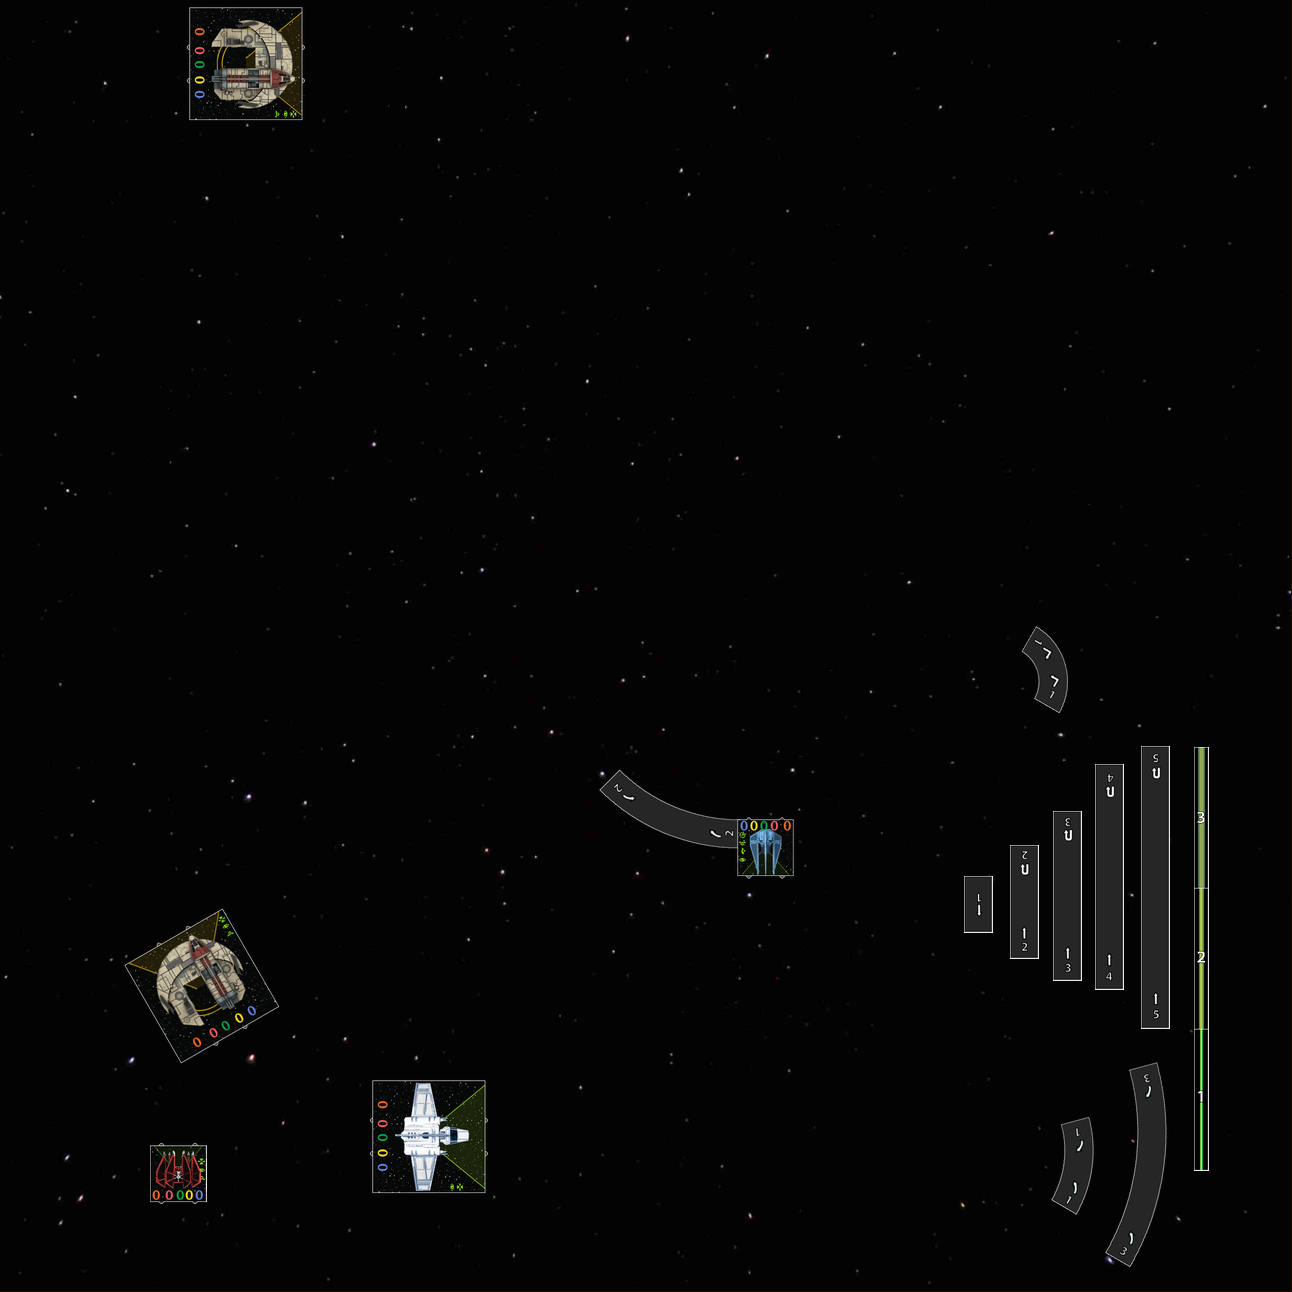
Turn 1: The Dengaroo approaches
I am not going to move Manaroo, but lets just assume she stays out of the fight lol. I think that is fair because that is literally all she ever does. I had Dengar do a combination of 3 banks and barrel rolls to come in at this position. It is pretty close to the three Dengar lists (2 Dengaroos, 1 other) that I have played against with my squad.
This would be around turn 3, and if you followed my last post about castling, this is where you should end up. The bait is set for Dengar to try and get some damage on a cloaked Echo or a focus/evade Ryad. The hope is that he gets invested enough to attempt to move forward one more time before trying to turn around.

Turn 2: Dengar takes the bait
Dengar probably was able to take off a shield on Echo or Ryad. But, now he is going to have a hard decision. Echo is going to decloak and move before he moves, and now he has stress from Zuckass. So, turning into Echo has a very low chance of getting an in arc shot on her. He also knows that Ryad is going to do a 4/5 k turn. But, there isn't a lot he could do to chase it without showing his back to Echo and Palp. The best choice would then be to try and take out Palp.
Echo decloaks to the right and back

- Palp stops for a stress
- Ryad does a 4k for evade/focus
- Echo does a 3 straight for a cloak
- Echo decided to go straight just in case Dengar turned in or 2 slooped early. Echo then cloaked to set up for next turn.
- I think, in hindsight, that it should really be a 4 straight
- Dengar did a 2 straight to just go for more Palp damage.

Turn 3: The kill box turns on
Now, Echo has been slowly getting into a much better position. She has potentially lost all her shields right now, though. The goal right now is to turn Palp to block Dengar from turning toward Echo, and using Ryad to block Dengar from totally escaping the box.
- Echo decloaks right and in

- Palp does a 1 slight to clear stress
- Ryad does a 3 for a evade focus
- Echo does a 1 hard for an evade
- Dengar attempts a 1 hard, but bumps

Turn 4: A box that can move!
Dengar bumping Palp means that he had to switch his firing to most likely Ryad. Meanwhile Echo gets to start using her 4 dice primary to some success.
Now Dengar has probably started to take damage; and, if I have been successful, his damage has been spread out enough to still have all of my ships.
- Echo decloaks to the right and back

- Palp goes 1 straight to clear stress and get a focus
- Ryad does a 3k for a evade and focus
- Echo does a 1 hard and a barrel roll
- Dengar does a 1 hard

Turn 5: Do or die time
We are now on our 5th round of firing. At the end of this turn, I would imagine that Dengar will be critically hurt, and/or one of my ships will be destroyed
Now it is time to commit to killing Dengar
- Echo decloaks left and back
- Palp does a 2 hard for the stress
- Ryad does a 3 straight for a bump and evade
- Echo does a 1 hard
- Dengar does a 1 hard
- I'm not actually sure what Dengar would do here, so I would try to spread out my arcs enough to catch him in at least two

Final Thoughts
Dengar has had 5 shots if he got no ability shots, and I have had 7 with no ability. He has not been able to shoot the same ship every turn, and I have. His shots are still a lot more lethal than mine, so who knows what the outcome would actually be.
Hopefully, and with some luck, Dengar would be caught in two arcs and die/run away. U boats/Zuckass of any kind are a hard match up for the phantom, but I'm hoping this post has shown how to use your two aces to make an enemy be forced into tough decisions. As for the exact decloak/movement combos, use the 2 bank back if you are flanking/chasing and use the 2 bank in if you are k turning. Every decloak is slightly different because of the obstacles present.
In my next post I am going to talk about decloaking and moving when an enemy moves before you. It adds a new layer to movement that is very tricky, but very fun.
No comments:
Post a Comment